Dadafu
A family building guide
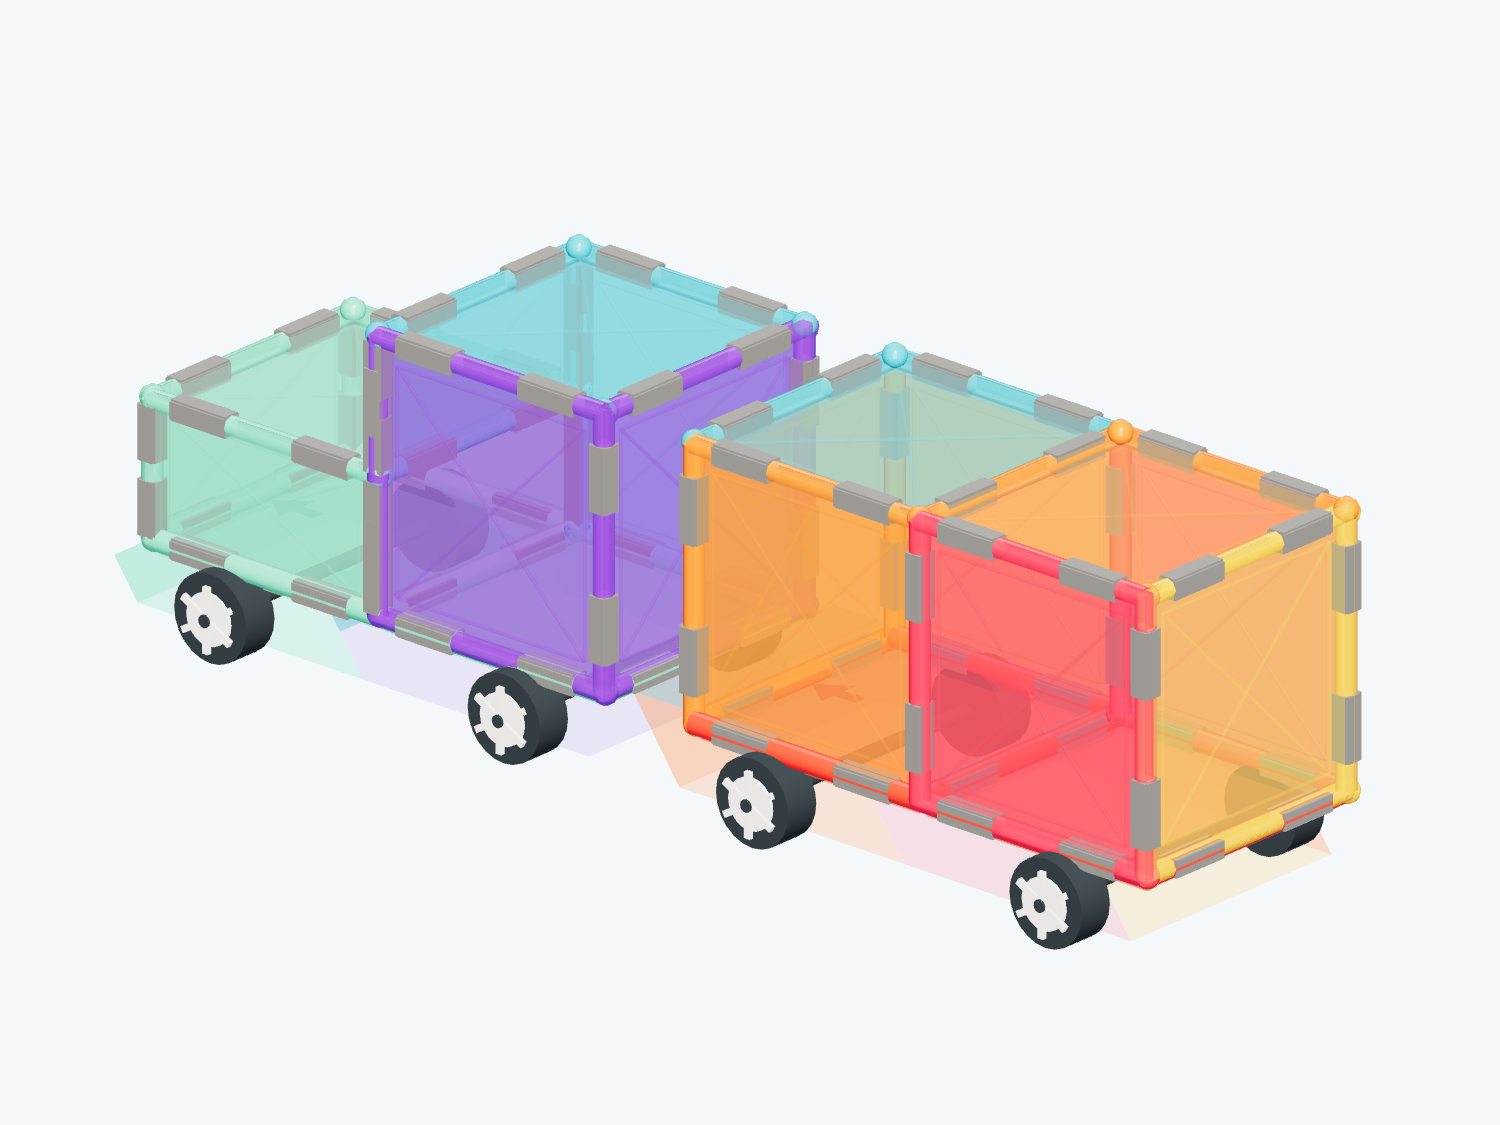
The Two-Car Photo Train
17 magnetic tiles + 2 car bases · 7 steps
A low green hood, a blue-and-purple cab and an orange-and-pink wagon
What pieces do you need?
- ×2car bases
- ×4short rectangle tiles (1 × 0.5)
- ×13square tiles
Compare with your tile set
Choose the exact set to compare quantities. For other brands or mixed boxes, use each plan’s piece list.
13 squares, four 1×0.5 short rectangles and two car bases. Check the actual rectangle proportions, chassis size and magnetic connections first.
Rebuild the product-photo train with a half-height green hood and a one-tile-high cab, then add a colorful passenger wagon. Roll each car separately and line them up.
Before you build with real tiles
- This model contains 13 squares, four 1×0.5 short rectangles and two 2-by-1 car bases. No extra tall triangles are needed; substitute colors freely.
- The product sheet lists 34 squares, four rectangles and two bases. Still check the actual rectangle proportions, deck sizes and magnet positions; matching counts do not establish compatibility.
- The hood is half a tile high. The cab and wagon are each one tile high. Do not substitute a 2×1 rectangle for the required 1×0.5 short rectangle.
- There is no coupler between the cars. Moving one may not move the other. Push each chassis gently rather than pressing the roof; digital checks are not a physical trial.
How to build it, step by step
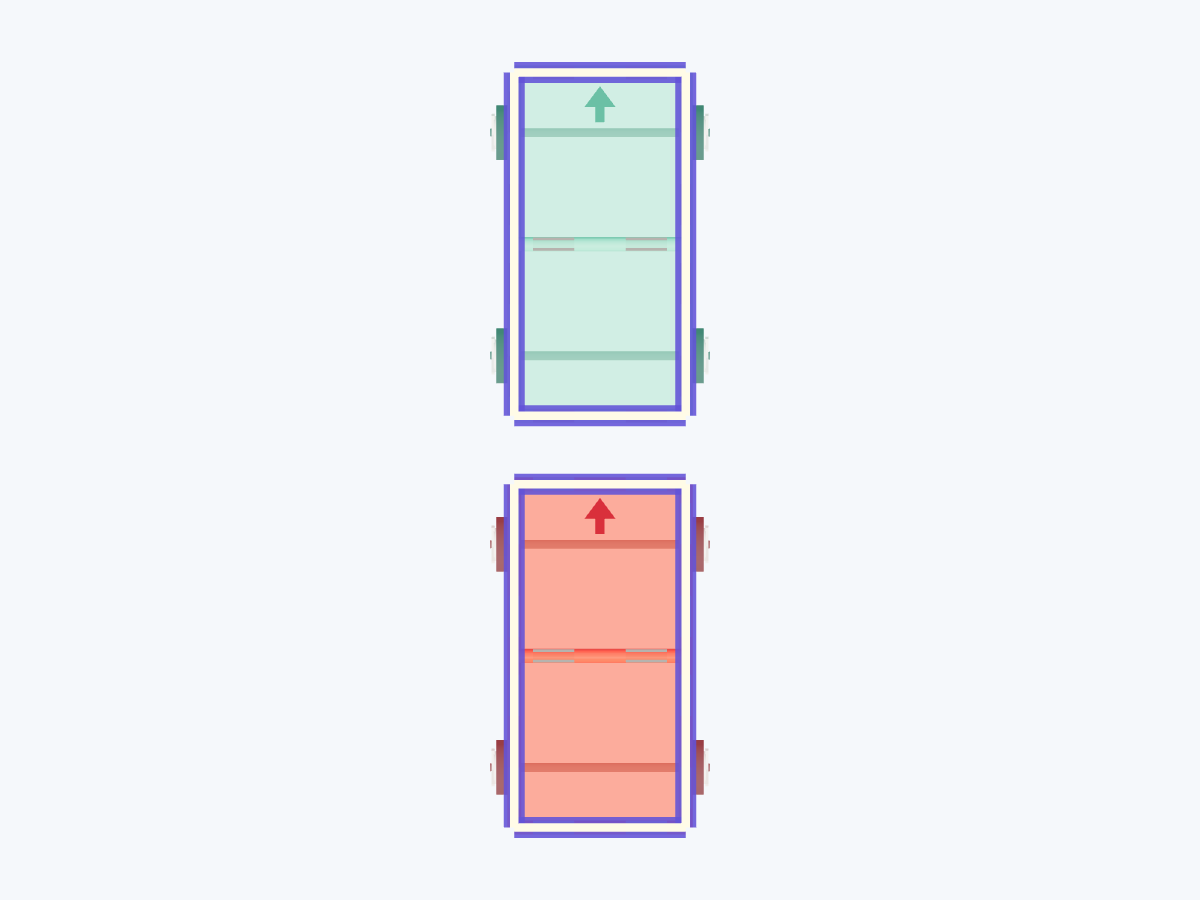
1. Line up the two chassis
Add in this step: 2 car bases
Point the long decks forward. The first carries the green engine; the second carries an orange-and-pink wagon. Leave a gap.
Hands-on tip: Use 2-by-1 tile decks with compatible top magnets. Do not bridge the gap between the cars with tiles.
Step 1 / 7 2. Build the half-height hood walls
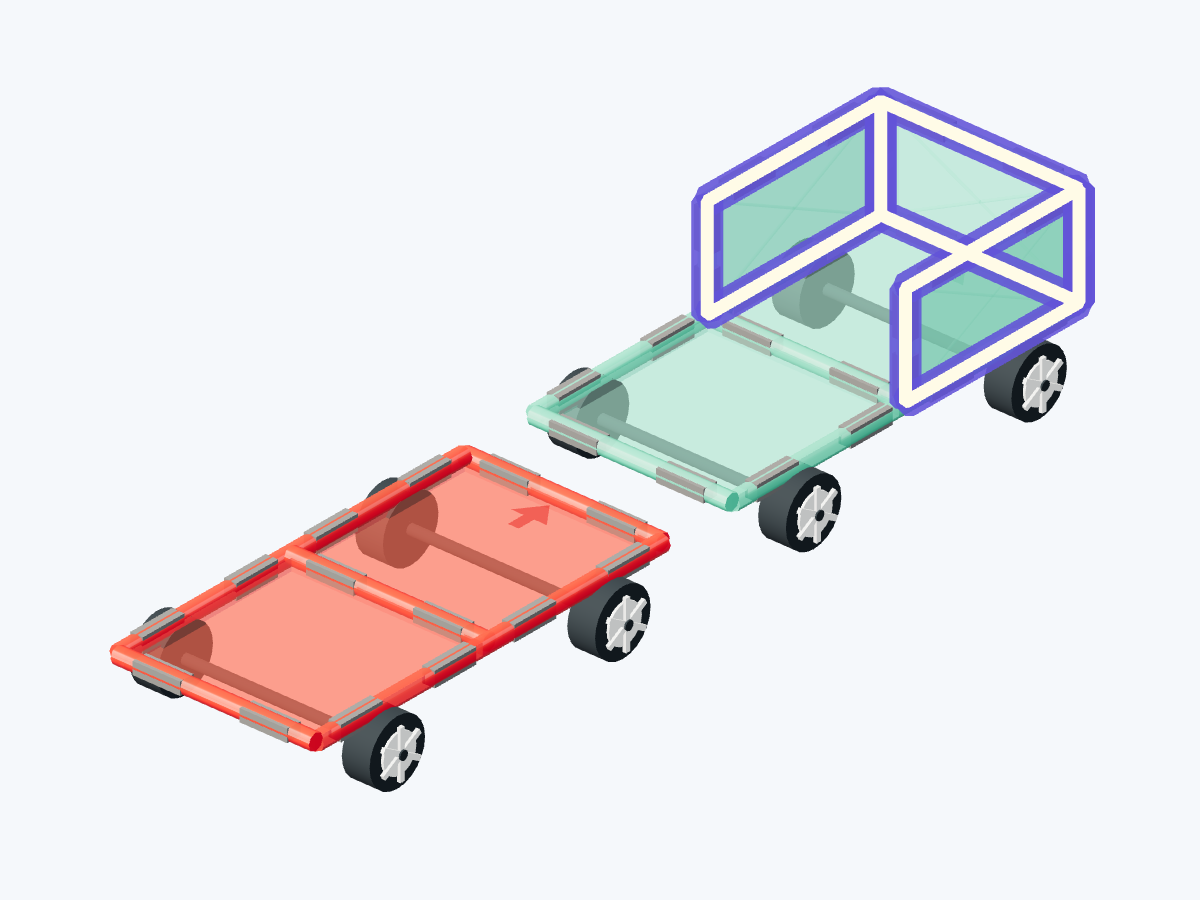
Add in this step: 3 short rectangle tiles (1 × 0.5)
Place one short rectangle on each side of the front half and a third across the nose. The short dimension points upward.
Hands-on tip: Join each long edge to the deck and close the two half-height corner seams while an adult steadies the sides.
Step 2 / 7 3. Cap the low hood
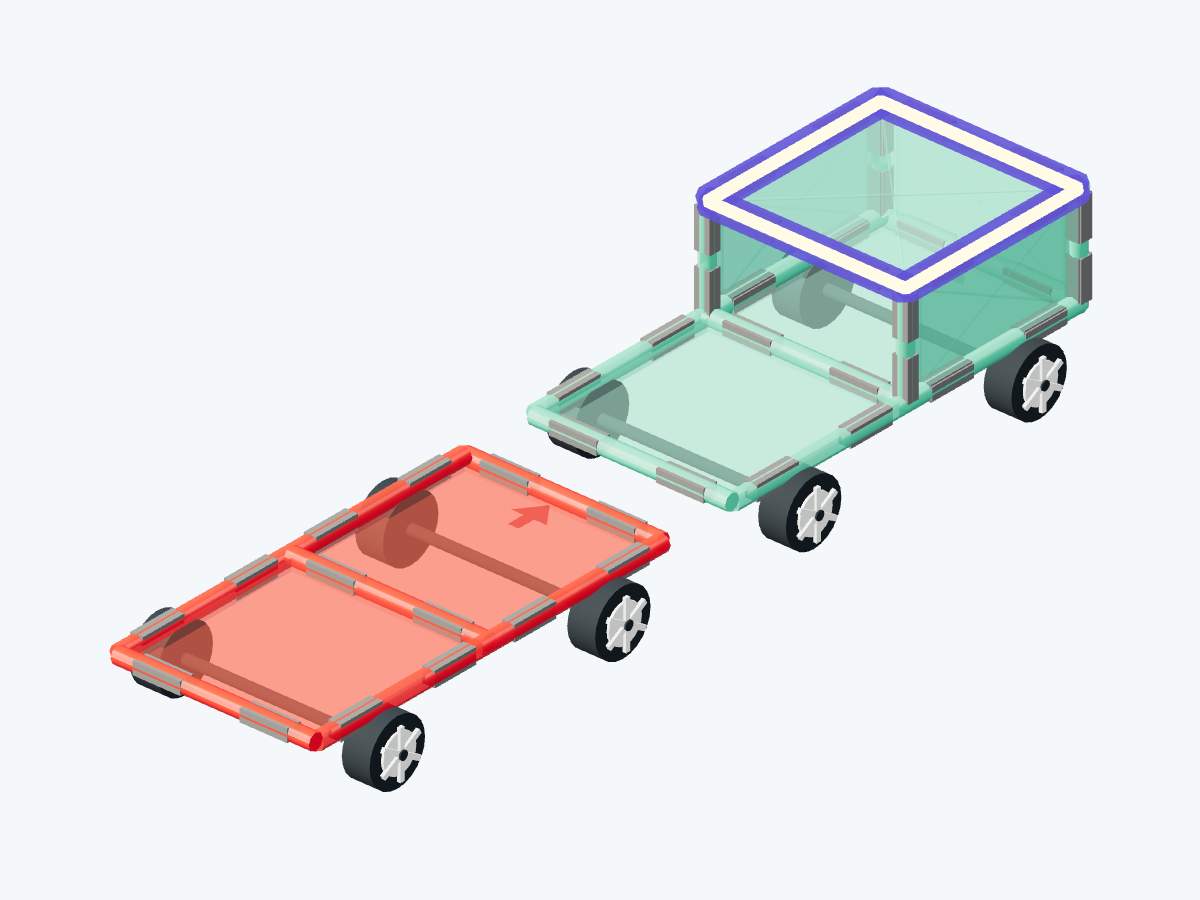
Add in this step: 1 square tiles
Lay one green square over the half-height front section. Keep the rear half open for the cab.
Hands-on tip: Align the square with both side walls and the nose before lowering it gently.
Step 3 / 7 4. Enclose the one-tile-high cab
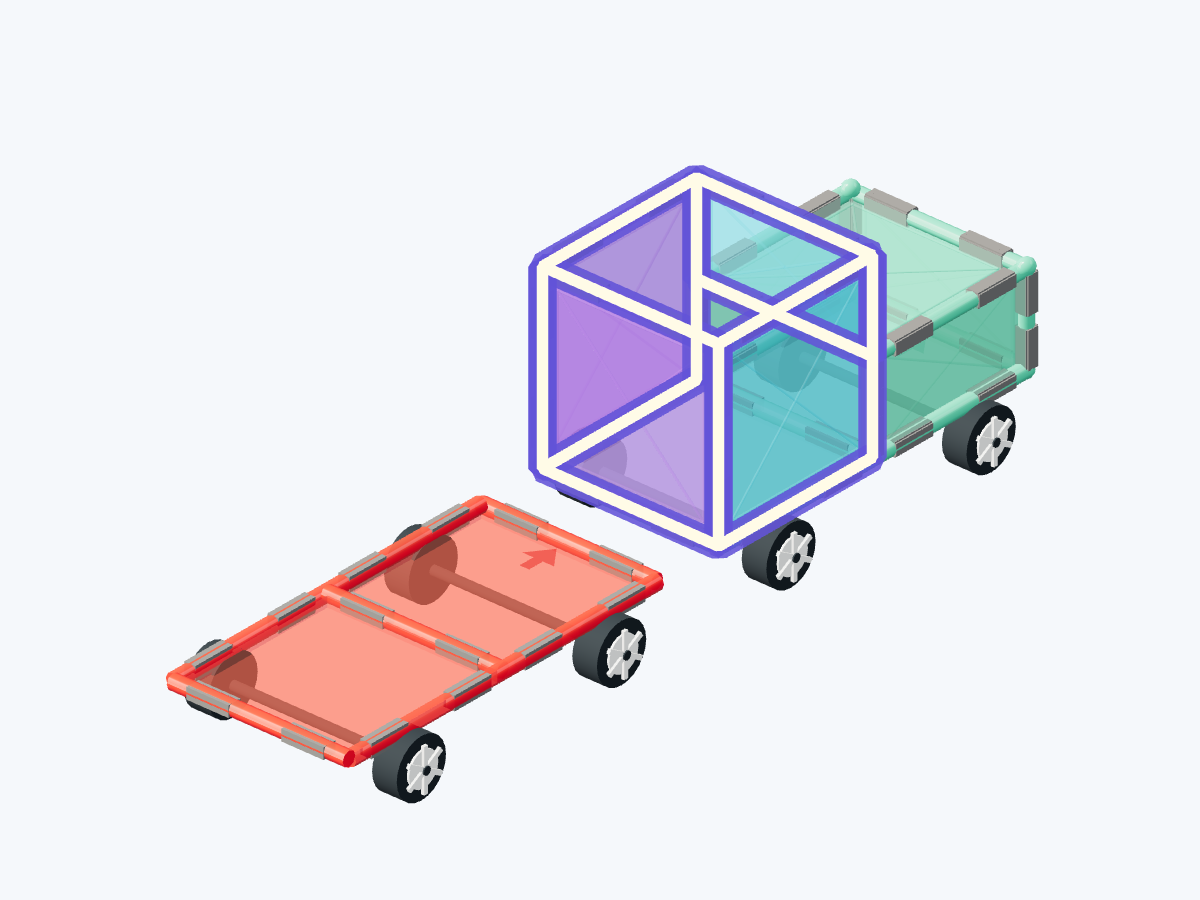
Add in this step: 3 square tiles · 1 short rectangle tiles (1 × 0.5)
Use a square at each side and the rear. Place the last short rectangle above the hood’s rear edge to close the cab front.
Hands-on tip: Join the three squares to the deck. Connect the front short rectangle to the hood edge and both cab sides before letting go.
Step 4 / 7 5. Roof the cab
Add in this step: 1 square tiles
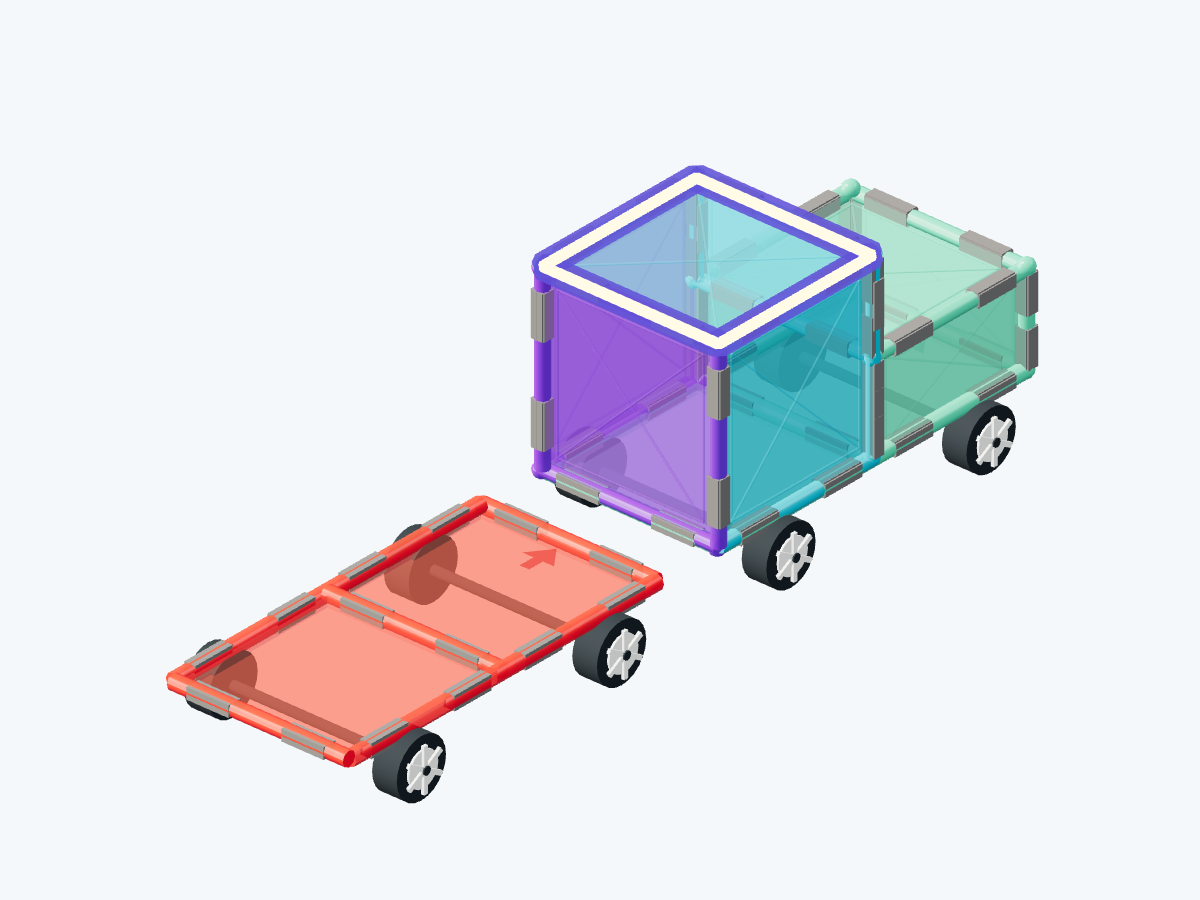
Cap the cab with one blue square. The low hood and higher cab now form the photographed engine silhouette.
Hands-on tip: Align all four roof edges. Hold the chassis rather than lifting the vehicle by its roof.
Step 5 / 7 6. Build the long passenger wagon
Add in this step: 6 square tiles
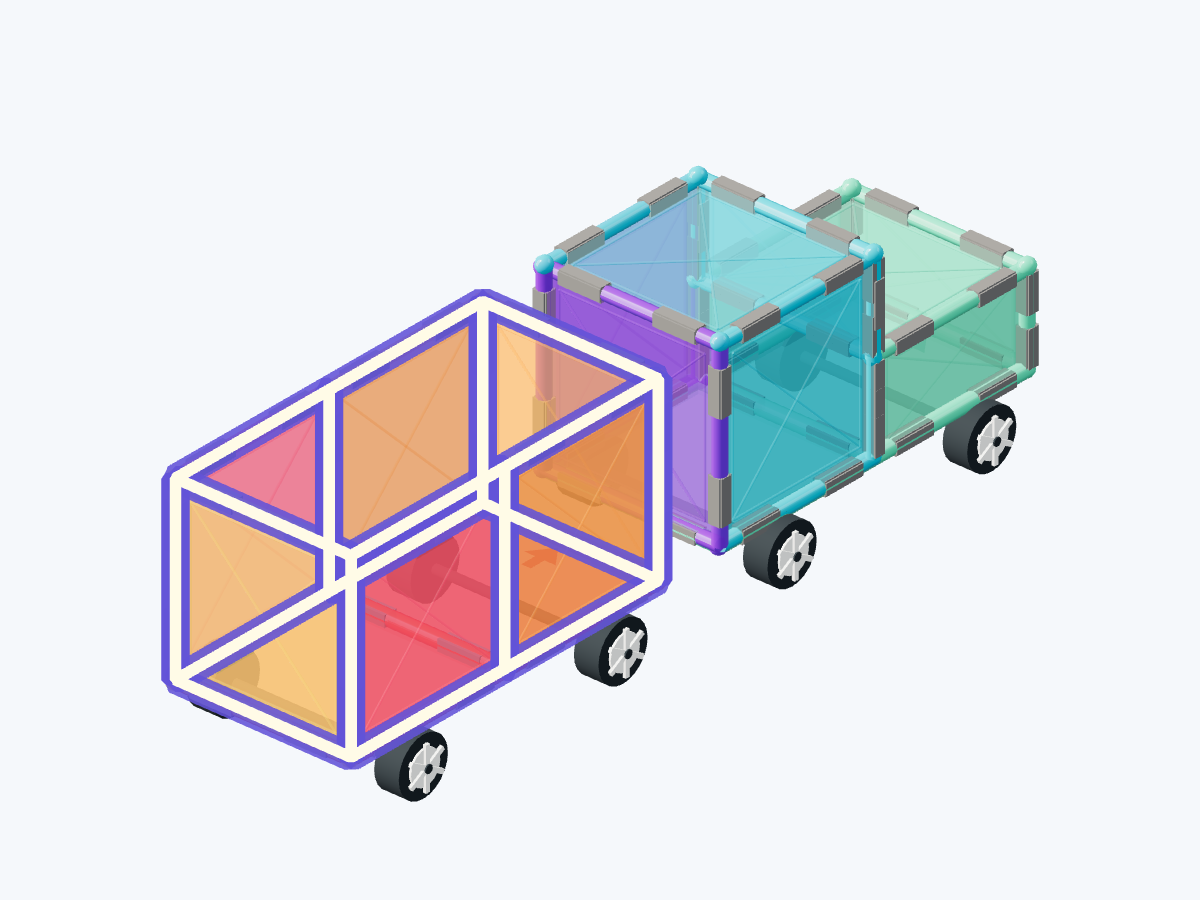
Use two squares on each side and one at each end to make a one-tile-high orange-and-pink wagon.
Hands-on tip: Join all six bottom edges to the deck and close the end corners. Keep this wagon separate from the engine.
Step 6 / 7 7. Close the wagon roof and depart
Add in this step: 2 square tiles
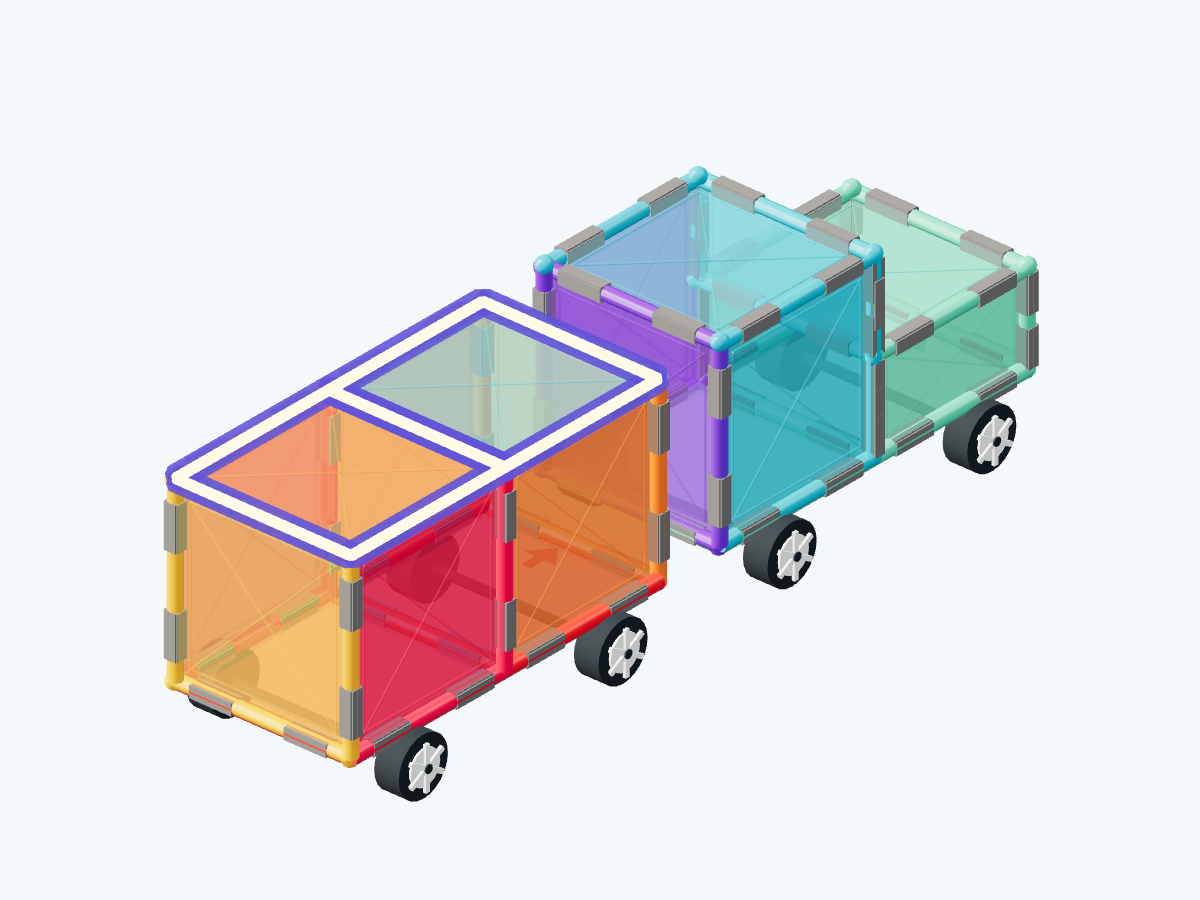
Cover the wagon with two squares. Its roof aligns with the engine cab; line up both cars.
Hands-on tip: Test each chassis with a gentle push. No coupler is modeled, so move each car separately and avoid pressing the roofs.
Step 7 / 7
A little help for grown-ups
You do not need to plan a lesson. Use these prompts when you reach a tricky step, or when your child wants to try an idea of their own.
1. Line up the two chassis
Roll each chassis separately and choose the forward direction.
See this step2. Build the half-height hood walls
Compare with a square: the hood should be only half as tall.
See this step4. Enclose the one-tile-high cab
The cab rises just half a tile above the hood, making a small step.
See this step5. Roof the cab
Compare with the finished model: the cab and wagon should have the same height.
See this step6. Build the long passenger wagon
Who will ride in the wagon? Let your child choose its colors.
See this step7. Close the wagon roof and depart
Put the screen away, choose two stations on the table and roll the physical cars between them.
See this stepTake this plan to the building table
Your subscription includes printing and saving PDF guides: materials, views, building steps and parent tips, ready for your family to use together. A parent manages sign-in and the subscription.
Print / Save as PDF