Dadafu
A family building guide
Steam Train Station
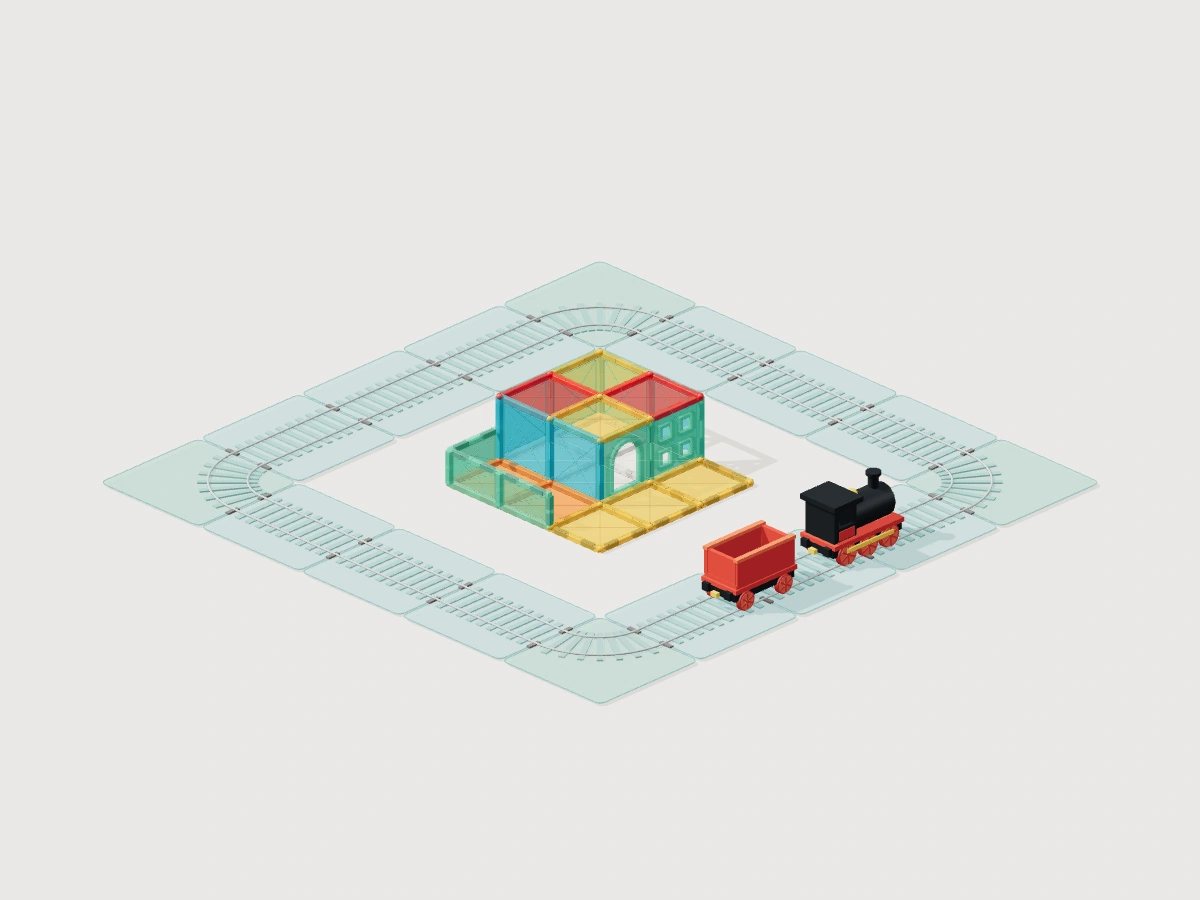
24 magnetic tiles + 2 toy accessories · 7 steps
A colorful waiting room, a low platform and a cargo stop for your toy train
What pieces do you need?
- ×19square tiles
- ×1four-pane window tiles
- ×1arch door tiles
- ×3short rectangle tiles (1 × 0.5)
- ×1toy steam engine (separate toy)
- ×1toy train carriage (separate toy)
Compare with your tile set
Choose the exact set to compare quantities. For other brands or mixed boxes, use each plan’s piece list.
Prepare 24 magnetic tiles: 19 squares, 1 square door, 1 square window and 3 half-height rectangles measuring 1 × 0.5 square units. Use matching square-edge lengths; colors may vary. Also use a separate toy steam engine and 1 carriage if you have them; these are 2 toy pieces, not magnetic tiles or items supplied by Dadafu. The digital scene has 16 track segments, outside the tile count. Real tracks are optional. This exact station has not been physically tested.
“The next train is arriving!” Build a little station together, sell a pretend ticket through the window and guide the steam engine to its stop. After the passengers are ready, the red carriage has a delivery to make.
Before you build with real tiles
- Lay all nine floor squares on a clear, level surface. The platform stays at floor height, so nobody needs to build a bridge or lift a train onto tiles.
- Close the waiting-room wall corners before adding its four roof squares. Every roof square meets two wall tops and neighboring roof edges. An adult holds the walls and unfinished roof; if a joint loosens, remove that roof square, reconnect the corner and try again.
- Keep the doorway and the cargo bay opening facing the platform. The low cargo walls stay on the floor. Use pointing and pretend parcels for loading; the roof is not a storage shelf.
- The steam engine and red carriage represent separate toys. Real toy sizes, couplers and track gauges vary. Leave a clear gap beside the platform and check your own train can pass without touching the tiles.
- The loop is a digital track layer: there is no need to buy any track for this activity. A clear route on the floor works too. Make “chuff chuff” sounds together as the train leaves.
- This is an original digital plan, not a physically tested design. Digital support and clearance checks do not measure real magnet strength, tipping, toy compatibility or a family’s completion experience.
Before we start
Build a train station with 24 magnetic tiles, then bring 2 separate train toys. The 7 steps make a waiting room, low platform and loading area.
Do the magnetic tiles make the steam train too?
The material list is 19 × square tiles, 1 × four-pane window tiles, 1 × arch door tiles, 3 × short rectangle tiles (1 × 0.5), 1 × toy steam engine (separate toy), 1 × toy train carriage (separate toy). The steam engine and carriage are separate toys, not built from these magnetic tiles. Compare your train with the station before building the walls and leave enough space for it to pass.
Can we use OugerToy 104-piece set?
The recorded pieces in OugerToy 104-piece set cover the quantities we can confirm. Still unconfirmed: four-pane window tiles, arch door tiles, short rectangle tiles (1 × 0.5), toy steam engine (separate toy), toy train carriage (separate toy). Check these before starting; unknown does not mean missing. Quantity matching does not confirm that the sizes, magnets or connections will fit.
How do we start building the station?
Lay out the waiting room floor, platform and loading area first. Join the wall corners before adding the roof. A grown-up supports each roof tile until the edges meet; the child can choose colors and find the next piece. If you stop early, the floor and walls can be an open-air station until next time.
Do we need to buy a track for station play?
No extra track is required for this activity. The online loop is digital track; at home, use a clear route on the floor or track you already own. Take turns selling imaginary tickets, calling the next stop and guiding the toy train. Use only the toys’ own compatible couplers, and move the route outward if the train touches the station.
Can we print the steps and put the screen away?
Yes. A Dadafu subscription includes printing and saving guide PDFs, with materials, steps and parent tips together. Open Printable guide and continue through the parent account. Check the parent area for current subscription availability.
This digital guide has not been physically tested. Check connections and stability with your own tiles as you go.
How to build it, step by step
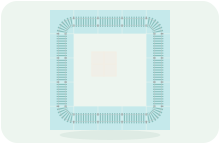
1. Lay four waiting-room floor squares
Add in this step: 4 square tiles
Make a two-by-two square of floor tiles for the waiting room.
Hands-on tip: Lay all four tiles flat with full edges meeting. One grid unit is the edge of your square tile; use any colors you have.
Step 1 / 7 2. Add the low platform and cargo floor
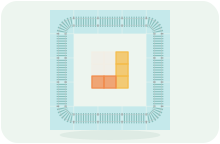
Add in this step: 5 square tiles
Lay three yellow squares in a row beside the room on its right. Add two orange squares in front of the room, completing a three-by-three floor.
Hands-on tip: Platform and cargo tiles stay on the ground without stacking. Try moving your own train outside the platform now and leave a gap before building higher.
Step 2 / 7 3. Join the back and left room walls
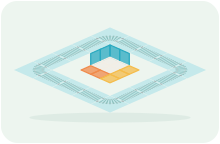
Add in this step: 4 square tiles
Stand two squares along the back and two along the left of the waiting room. Join their corner so the walls wrap around the floor like an open book.
Hands-on tip: Each bottom edge joins a complete floor edge. Connect the upright corner before releasing the finished group slowly.
Step 3 / 7 4. Face the ticket window and door toward the platform
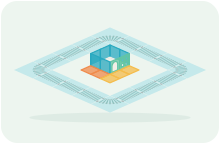
Add in this step: 1 four-pane window tiles · 1 arch door tiles · 2 square tiles
Place the window on the rear half of the right side and the door on its front half. Add two squares across the front of the room to close its wall corners.
Hands-on tip: The window and door both join full floor edges; the doorway leads onto the yellow platform. With the roof still open, steady and check all four room corners from above.
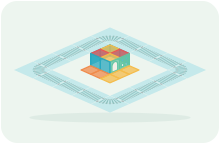
Step 4 / 7 5. Close four roof squares over the room
Add in this step: 4 square tiles
Start at a room corner and join the four roof squares one by one. Alternate yellow and red so an approaching driver can recognize the station.
Hands-on tip: Each roof square has two outer edges on wall tops and two inner edges joining its neighbors. Check the wall corners first and support unfinished panels; keep the roof over the room, without an overhang above the platform.
Step 5 / 7 6. Make a low cargo bay with an open platform side
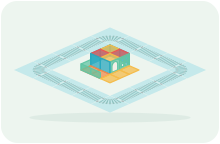
Add in this step: 3 short rectangle tiles (1 × 0.5)
Join one half-height rectangle along the left of the orange cargo floor and two across its front. Leave the right side open for loading from the platform.
Hands-on tip: Each rectangle is one square wide and half a square high. Join complete floor edges and the front-left corner. Keep the bay low and use imaginary parcels.
Step 6 / 7 7. Bring in the engine and red carriage
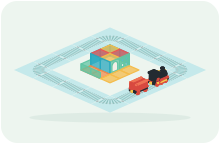
Add in this step: 1 toy steam engine (separate toy) · 1 toy train carriage (separate toy)
Place the separate toy steam engine and carriage on the route outside the platform. The digital scene uses a loop; at home, follow your existing tracks or a clear floor route. Stop before passengers board or cargo is loaded.
Hands-on tip: The train is an extra toy, not a model built from these tiles. Use only your toy’s own compatible couplers. Check room for the whole train, push gently at its body, keep hands off the wheel rods, and never lift the station by its roof.
Step 7 / 7
A little help for grown-ups
You do not need to plan a lesson. Use these prompts when you reach a tricky step, or when your child wants to try an idea of their own.
1. Lay four waiting-room floor squares
“Where could our passengers wait when it rains?” Point to the room together.
See this step2. Add the low platform and cargo floor
“Which way do passengers go, and where does the cargo wait?” Let your child point out both places.
See this step3. Join the back and left room walls
One person steadies the walls while the other finds a complete edge to join. Which corner is already closed?
See this step4. Face the ticket window and door toward the platform
“Where do you go after buying a ticket?” Walk two fingers from the window to the door.
See this step5. Close four roof squares over the room
“Which two walls are under this roof tile?” Your child points while the adult supports and joins it.
See this step6. Make a low cargo bay with an open platform side
“What will we deliver, and which way will it go?” Ask your child to trace the loading route.
See this step7. Bring in the engine and red carriage
“What is the next stop? Can the station keeper tell the driver when to stop?” Take one short trip, then swap roles.
See this stepKeep playing together
Sort the listed tiles and choose a level floor space together. Put your own train beside one square to judge its size, then leave room for it to pass the station. Point out a route on the bare floor or use tracks you already have; no extra purchase is needed. The adult can prepare the printed guide before play.
Take a role, then swap
Station builders
The child chooses colors and connects the next tile. The adult steadies the room corners and helps join the roof. Swap who finds the next piece whenever you finish a stage.
Driver and station keeper
One person gently guides the toy train. The other offers a pretend ticket, calls the stop and checks the platform is clear. Swap jobs after one trip so everyone gets a turn at the window and the controls.
Start your story
A ticket to somewhere new
Ask, “Where would you like to go?” Pass an imaginary ticket through the window, then walk two fingers through the door onto the platform. Let the child choose the destination and the station name.
The train is arriving
The station keeper says, “Slowly… stop here!” Stop beside the platform, pause for imaginary passengers, then set off around the route. If the train touches a tile, stop, move the route farther away and repair together before another trip.
One special delivery
Choose an imaginary parcel for the low cargo bay. With the train stopped, pretend to load the red carriage and decide who is waiting for the delivery. Take it around the route, return, unload and swap jobs.
Try a variation
Keep the supported room and low platform, then change the station name, ticket story or delivery destination. Move the floor route farther out for a larger toy. If you pause midway, a floor and walls can already be a roofless station; add the roof together next time.
Celebrate your build
Park the train for its last stop and let your child announce the station name. Show each other a part you helped build and tell the story of today’s delivery. Choose whether to leave the station ready for another journey or sort the tiles together.
Take this plan to the building table
Your subscription includes printing and saving PDF guides: materials, views, building steps and parent tips, ready for your family to use together. A parent manages sign-in and the subscription.
Print / Save as PDF